Posts

Showing posts with the label Thinlits

Yet Another Poinsettia Card

Image
Looking through my abundant supply of discontinued designer series paper, I designed a final card using the Peaceful Poinsettia bundle. I think I made and gave or sent over 100 cards this year, so I had quite a variety that went out. Several posts back, I shared super simple designs that helped me crank them out. They, too, used discontinued dsp. I had thought this particular dsp was rather busy and had struggled to use it even though I used most of the rest of that pack. However, it was perfect for this card. After adhering the holly leaves with berries to the card, I colored them in with my Stampin' Blends, although I could have used the coordinating markers. I guess I've just gotten into the habit o fusing my Blends even before picking up my markers! I used the open die on the dsp and then cut the detailed flower from Basic Black cardstock using both the open and the detailed thinlits together. Even the holly and berries were cut from Basic Black. I've been using a l...

Still More Peaceful Poinsettia Bundle

Image
My class in early December featured the Peaceful Poinsettia bundle, in case you hadn't figured that out by all the posts using this set. I am so glad I purchased this set! I saw something similar to this card on-line (stampingsmiles.com) and loved it. I did not yet have the Delicate Lace Edgelits that she used, but they have since arrived and I will be showcasing them in the very near future!  So I used the curved Framelit from the "In the Woods" set. My leaves are different and I added the Gold Metallic Thread. After cutting out the holly leaves, I trimmed them down to exclude the berries.  All these delicate cuts were made with adhesive sheets on the back of my cardstock. If you look closely, you will see that my flower is raised up with Stampin' Dimensionals. Products Used: Peaceful Poinsettia rubber stamp set (7), W 147784, $29.00; C 147781, $21.00 Detailed Poinsettia Thinlits Dies (8), 147925, $33.00      Bundle, stamps & dies: W 149964, $...

More Peaceful Poinsettia Bundle

Image
Once I started using this stamp set, the ideas just kept coming, although I admit that I had been looking at samples on-line and I have no idea where parts of this design came from. I have a tendency to think that my images need to stay inside the shapes, like the ovals used here. However, this design element extended past the edges and it actually adds to the texture. Of course, the Stampin' Dimensionals behind it help. I knew as soon as this annual catalog came out that I would love the Tufted 3D Dynamic Textured Impressions Embossing Folder. Its use on the Cherry Cobbler background adds a depth and richness to the overall effect of the card. Although you can't see it looking at this picture, I used Wink of Stella on the white holly berries. Because of the layout, I needed smaller words than came with this set, so I used my other favorite stamp set, His Light. The red and greens in this card are Cherry Cobbler and Old Olive. As I write this, all my cards have been maile...

Peaceful Poinsettia Bundle

Image
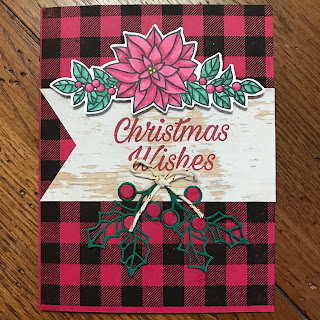
This bundle is just too much fun! For this card I mixed my favorite Lovely Lipstick with Shaded Spruce and Early Espresso, although everyone thinks my checks are stamped in Basic Black. I had fun figuring out how to make a card using the cut-out, stamped poinsettia. I love the result. Thankfully I used the Stamparatus for the Buffalo Check background. With the grid sheet to protect its base from ink, I was able to line up the background stamp on the open card so it would not extend past the score line. Then, when I didn't get an even transfer of ink, I could just do it again with perfect alignment. Products Used: Peaceful Poinsettia rubber stamp set (7), W 147784, $29.00; C 147781, $21.00 Detailed Poinsettia Thinlits Dies (8), 147925, $33.00      Bundle (stamps & dies): W 149964, $55.75; C 149962, $48.50 Buffalo Check rubber background stamp, W 147797, $20.00; C 147794, $15.00 Lovely Lipstick 8-1/2" x 11" cardstock (24), 146970, $8.50 Whisper White 8-...

Peaceful Poinsettia stampset and Detailed Pointsettia Thinlits Bundle

Image
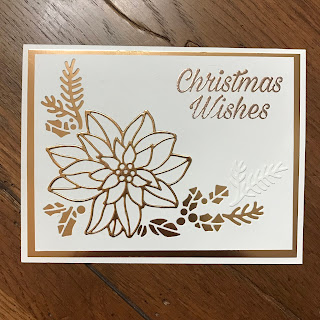
I love the poinsettia yet found myself reluctant to order the poinsettia bundle in the Holiday Catalog  because I have so many Christmas sets that have been discontinued. I finally gave in and have had so much fun creating with it! Because of the shape and size of the corner thinlit, there aren't too many options for card fronts when using the corner piece. The variety, I think, comes from what you place behind it. Below are two variations of the same format. The first card is done in Whisper White with Copper foil behind the cut-outs and Copper Stampin' Emboss powder for the greeting. Unwilling to waste the boughs cut from the Whisper White card stock, I simply added them on the card front for added texture. The thinlits include an open frame for the poinsettia as well as an intricate thinlit.  In order to achieve the large poinsettia, you need to use both. The intricate piece fits nicely inside the open framelit so you can run them both through the Big Shot at t...

Botanical Tags Thinlits

Image
I am making a conscious effort to use that gorgeous designer series paper I so readily purchase! Choosing my paper before actually designing the card allowed me to choose my colors accordingly. Originally I wasn't sure I was going to like the new core color, Mango Melody, but this paper made me love it! I purchased the Botanical Tags Thinlits without the stamp set because I think they are so versatile. I really thought I wanted to make a bookmark with them (and I did make one as a gift for those who placed orders at my stamp class). But I thought the birds fit very nicely with the flowers on the paper. I also decided that with two birds, this card would make a great anniversary card, even though this one is a birthday card.  Products Used: Best Birds photopolymer stamp set (13)147136, $21.00 Mango Melody 8-1/2" x 11" card stock (24), 146989, $8.50 Night of Navy 8-1/2" x 11" card stock (24), 100867, $8.50 Garden Impressions 6" x 6" Designer S...

Impossible Card

Image
When making this card with my class attendees, I had to assure them that my directions were correct. It just did not seem possible that the card would end up like the sample!  I think that's why its design is called "impossible". After realizing the theory behind this card, I hope to try one going the other direction. The hardest part of this card was cutting the designer paper to fit because it has a one way design. Otherwise, you simply cut two pieces of dsp 2-1/2" x 4" and then cut away the open area. I cut in 3/4" and down 2-1/8"; turn and cut to edge. Anyway, you just have to use a little math to do this on your own. I told my class attendees that you just have to remember the standard card size and be able to figure out half of each dimension. So, if the card is 4-1/4" x 5-1/2", you need to know that half of 4-1/4" is 2-1/8" and half of 5-1/2" is 2-3/4". The first step is to score and crease the length of your ...

Seaside Thankfulness

Image
I'm still designing thank you notes for the men who have filled in for our Adult Bible Fellowship this summer. This one was almost too easy, but it is so appropriate for a man who, with his wife, lives on the other side of Canandaigua Lake from us. Their cottage is right on the lake with a boat house in place of a garage. This just seemed so appropriate for him. It's another two weeks before he will be teaching, but I'm prepared! This card is simply one of our note cards with a piece of last year's Serene Scenery dsp backed with Bermuda Bay card stock. The Adirondack chair is cut from Chocolate Chip card stock using the Seasonal Layers Thinlits. The only stamping uses words from the Sheltering Tree set and the bird is from the Sitting Here stamp set.

Fresh Florals

Image
This card shows off one of our new In Colors, Berry Burst, using the new Fresh Florals Designer Series Paper Stack. Just love having these designs in all the new colors! Such a great stamp set, too, although I chose to use the Watercolor Wings set for this card. I cut my dsp the same size as my Whisper White - 4" x 5-1/4". Then I cut into the middle and folded back the edges, holding them in place with a single dimensional behind each flap. The butterfly is attached with dimensionals beneath body only. The Rhinestone Basic Jewels are left over from our previous annual catalog; I used the connected string of rhinestones. Products Used: Watercolor Wings photopolymer stamp set (15), 139424, $26.00 Whisper White 8-1/2" x 11" cardstock (40), 100730, $9.00 Berry Burst 8-1/2" x 11" cardstock (24), 144242, $8.00 Fresh Florals 12" x 12" Designer Series Paper Stack (40), 144131, $22.00 Berry Burst Classic Stampin' Pad, 144083, $6.50 Ros...

Special Reason

Image
I took a long time to decide to purchase the "Special Reason" stamp set and coordinating dies in the Occasions Catalog but finally decided I had to have it, partly because I like the sayings. My hesitancy was simply because I already have so many flowers and dies. But every time I flipped through the catalog, I stopped and looked this set over. I really like the fact that the label has two sizes for layering. I'm disappointed it's not in the annual catalog, but it is still available through the end of this month, or at least through May 22. Then it is available only while supplies last. Then the Sale-a-Bration add-on flyer appeared with different colors of glimmer paper! I had to have that paper pack. And I like the fact that the papers were 6"x6", which meant I didn't have to cut them down to run them through the Big Shot.

Remarkable You for Easter

Image
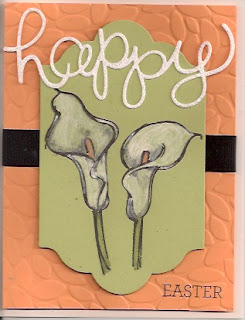
One of the lessons on using watercolor pencils was using colored cardstock. Since I didn't have the stamp set that was being used, I totally redesigned the card, making it an Easter card. I'm not sure if I like using the white pencil or not. I have used it to lighten my coloring, but this is the first I've used it on colored cardstock. I added a little Basic Gray for shading. I had some black grosgrain ribbon on hand that we no longer carry and added that to the card, but you could easily use a 5/8" strip of Basic Black cardstock. I never noticed that I had scanned this card crookedly, but you get the idea, I'm sure. The card base is Whisper White, although it's hard to tell that there is a frame of white around the Peekaboo Peach. Products Used: Remarkable You rubber stamp set (6), W 139891, $45; C 139894, $33 Crazy About You stamp set (33), W 138856, $52; C 138859, $39; P 137137, $25 Whisper White 8-1/2" x 11" cardstock (40), 100730, $9 Pe...

Watercoloring "Inside the Lines"

Image
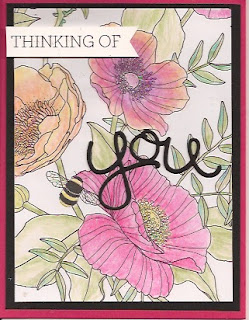
I have ordered more than one pack of Inside the Lines Designer Series Paper because I love it. And I'm finding so much versatility with it. Of course, I really should move on and use some other sheets in the pack... Because of the watercoloring on-line class I'm taking, I used two techniques on this card front: shading and mixing colors. I'm loving the Watercolor Pencils that coordinate perfectly with our colors! So much fun to color and then smooth the coloring out with the Aqua Painter. And I find myself adding a little clear Wink of Stella to the bee whenever he shows up on the paper. Products Used: Crazy About You stamp set (33), W 138856, $52.00; C 138859, $39.00; P 137137, $25.00 Melon Mambo 8-1/2" x 11" cardstock (24), 115320, $8.00 Basic Black 8-1/2" x 11" cardstock (24), 121045, $8.00 Inside the Lines 12" x 12" Designer Series Paper (12), free with $50.00 purchase Watercolor Pencils (13), 141709, $16.00 Aqua Painters (2), 1...

Designing with Leftovers

Image
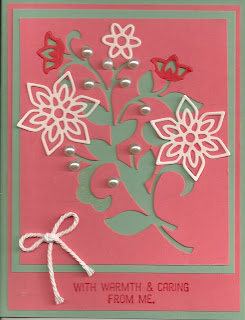
Sometimes I leave pieces of used card stock sitting around hoping for inspiration for future designs. That's how I came up with this card. The Flirty Flamingo card stock had been used to cut out the Flourish and just sat there begging to be used. I also had a scrap of Mint Macaron sitting on my table and decided the colors would work well together. Then there were the extra flowers I had cut from the Whisper White that worked nicely on the layers. I added the pearls and still thought the card needed a little something extra. So I grabbed a small scrap of Watermelon Wonder to cut out just the flowers using the same Flourishing Thinlit and slipped those into the openings on the flourish. A bow of Thick Whisper White Baker's Twine added the finishing touch. Products Used: Flourishing Phrases Bundle, W 142322, $70.00; C 142323, $59.25      Flourishing Phrases rubber stamp set (18), W 141531, $49; C 141534, $37.00      Flourish Thinlits (10 die...

Detailed Floral Thinlits for Christmas

Image
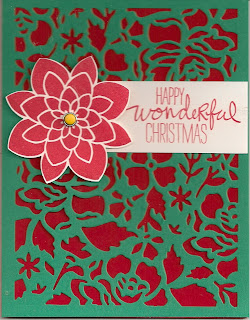
Still working on Christmas ideas with products not necessarily designed for the holiday. We made this card at my class this week and the ladies loved it, especially my one customer who is always looking for Christmas ideas. I chose the flower from Crazy About You because it came closer to looking like a poinsettia than many of the other flower stamps I own. Plus it coordinates with our Medallion punch. The Christmas greeting comes from the Wondrous Wreath stamp set. Note: My customers are helping me use up my Candy Dots and Candy Dot Brad Bases, which you'll see in the center of the flower. Products used: Wondrous Wreath photopolymer stamp set (9), 135047, $26.00 Real Red 8½" x 11" cardstock (24), 102482, $8.00 Emerald Envy 8½" x 11" cardstock (24), 141415, $8.00 Whisper White 8½" x 11" cardstock (40), 100730, $9.00 Real Red Classic Stampin' Pad, 126949, $6.50 Detailed Floral Thinlits (3), 141482, $29.00

Detailed Floral Thinlits

Image
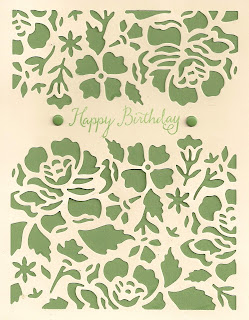
I'm always in need of birthday cards! With the Detailed Floral Thinlits, there is very little stamping required. Add a couple leftover  Candy Dots to coordinate with the Wild Wasabi behind the Very Vanilla and I had what I considered a perfect card. So easy! Products Used: Balloon Celebration photopolymer stamp set (28), 140675, $26.00 Wild Wasabi 8½" x 11" cardstock (24), 108641, $8.00 Very Vanilla 8½" x 11" cardstock (40), 101650, $9.00 Replace the Candy Dots with Enamel Shapes, Subtles (200), 141679, $9.00 Detailed Floral Thinlits (3), 141482, $29.00

A Rose and Cottage Greetings

Image
Sometimes mistakes lead to new ideas! I was cutting a rose from a scrap of Sale-a-Bration dsp using a Rose Garden Thinlits only to discover I had the die too close to the paper's edge. So I took my paper snips and cut it down and glued it to a piece of Melon Mambo cardstock, along with a leafy stem (same set of thinlits), and added some retired Melon Mambo ribbon to the edges. I then used Cottage Greetings stamp set to stamp flowers and a greeting on more SAB designer paper. Once again, as every spring, I rediscovered how much I like the Melon Mambo and Daffodil Delight combination. I guess I choose more bright colors when the warm and sunny weather arrives! For this card, my choice of green is Old Olive.

In Black and White

Image
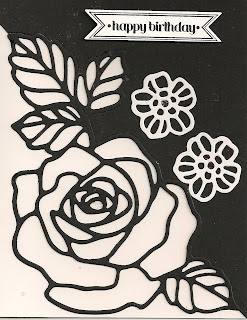
I love the vivid contrast of black and white that add such class to cards. These cards are so simple if you have the Rose Garden Thinlits Dies from Stampin' Up! All you have to do is cut a piece of Basic Black cardstock to 4" x 5¼", place the die diagonally on top and run it through the Big Shot. Adhere one of the "scrap" pieces and then line up the die-cut rose along the cut edges. I used Thick Whisper White cardstock to support the Basic Black pieces. Products Used: Rose Wonder photopolymer stamp set (14), 140697, $27.00 Basic Black 8½" x 11" cardstock (24), 121045, $7.00 Whisper White 8½" x 11" Thick Cardstock (24), 140272, $7.00 Archival Basic Black Stampin' Pad, 140931, $7.00 Rose Garden Thinlits Dies 95), 140619, $31.00 Bitty Banners Framelits (3), 129267, $15.00 (retiring)

A Happy Card

Image
I don't always know what to do with some designs on our papers, but when I looked at this one, my first reaction was, "What a happy print!" So I designed this card to be simply that: happy. This print is included in the Painted Blooms dsp, which retires with the current mini catalog June 3. I already had the Blackberry Bliss bow sitting in my work room and decided it would be perfect combined with our new word thinlits, introduced in the Occasions Mini Catalog and carried over into our new annual catalog. However, as I look at this photo of the card, I realize the top bow has slipped. I think I'll add an extra glue dot beneath one of its loops. Products Used: Daffodil Delight 8½" x 11" card stock (24), 119683, $6.95 Blackberry Bliss 8½" x 11" card stock (24), 133675, $6.95 Painted Blooms 12" x 12" Designer Series Paper (12), 137784, $10.95 Hello You Thinlits (4), 137363, $25.00 Bow Builder Punch, 137414, $18.00