Posts

Showing posts with the label Framelits

Floating Frame Technique with Tea Together Stamp Set

Image
I think I must have watched every video produced on how to make a card that looks like it has a floating frame.  Jennifer MacGuire apparently created the technique using Press 'n Seal paper. That trick does make it easy to transfer the elements, but I struggled every time to peel off the Press and Seal without removing the top layer of my cardstock, taking the color with it. So I had to add more color with my markers after I'd finished. Plus there is a certain sticky film that remains behind on my card stock. I eventually came up with my own way of doing it, but the cards I'm showing here were my first ones and used the Press 'n Seal. They look great in spite of my struggles (just don't look too closely). I stamped and colored the flowers from the Tea Together stamp set and then die cut them. Next step was to arrange them on a 4" x 5-1/4" piece of card stock which was later discarded. Then I laid a piece of Press 'n Seal over the top, pressing it...

More Peaceful Poinsettia Bundle

Image
Once I started using this stamp set, the ideas just kept coming, although I admit that I had been looking at samples on-line and I have no idea where parts of this design came from. I have a tendency to think that my images need to stay inside the shapes, like the ovals used here. However, this design element extended past the edges and it actually adds to the texture. Of course, the Stampin' Dimensionals behind it help. I knew as soon as this annual catalog came out that I would love the Tufted 3D Dynamic Textured Impressions Embossing Folder. Its use on the Cherry Cobbler background adds a depth and richness to the overall effect of the card. Although you can't see it looking at this picture, I used Wink of Stella on the white holly berries. Because of the layout, I needed smaller words than came with this set, so I used my other favorite stamp set, His Light. The red and greens in this card are Cherry Cobbler and Old Olive. As I write this, all my cards have been maile...

In the Woods Paired with His Light

Image
I have had so much fun with these two sets.  I love having words that express what I would like to say because of my deep faith. "His Light" stamp set is perfect for that. Then there's the Winter Woods stamp set with its coordinating framelits dies. So much versatility! All you need is your own creativity. For this card we made a wreath. I actually had my class members lightly trace a circle in pencil to make it easier to create a round wreath.  We then stamped the evergreen bough around the circle and then on scrap paper. I love the fact that Stampin' Up! included three framelits for this bough, making it so much quicker to cut multiples.  Products Used: Winter Woods rubber stamp set (7); W 147658, $31.00; C 147661, $23.00 In the Woods Framelits Dies (11), 147919, $33.00      Bundled: W 149991, $57.50; C 149992, $50.25 Cherry Cobbler 8-1/2" x 11" card stock (24), 119685, $8.50 Very Vanilla 8-1/2" x 11" card stock (40), 101650, $9.75 ...

Daffodil Birthday

Image
The stamp set, You're Inspiring, came out in last year's Occasions Catalog and I was thrilled to see it reappear in our annual catalog. I don't know about you, but I have always struggled to line up stamps when using them to create a border. Either they don't quite meet up or one is slightly angled from the other. But the Stamparatus helped me eliminate that problem. I found it necessary set my paper slightly lower than the top edge, actually setting it on the half inch line.  I then set the stamp to extend just beyond the edge of the paper. After stamping with Soft Sea Foam Ink, I lifted the plate from it's hinge and moved it down two notches to stamp again. Perfectly straight! Don't forget to anchor your card stock with one of the magnets or it might mess up your alignment. When I designed this card, I really wanted the soft, subtle background. Plus I'm having fun playing with the new colors and finding great combinations. I was playing with Soft Sea...

Using up Retired Products

Image
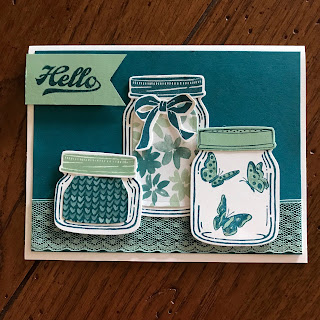
I was so sad to see Island Indigo leave our color families, although I love all the new colors.  Since I also had a lot of very pretty designer series paper left from a couple years ago that included the returning Mint Macaron, I decided to design a card around those products. You'll see I used the pretty lacy ribbon from when Mint Macaron was one of our in colors. The dsp is used inside two of the jars while the butterflies are stamped and colored.  This card was my way of demonstrating the technique I shared in a previous post where I made a template by cutting shapes from a piece of card stock. I then cut the jars and lids for my class attendees so they could practice the technique. I placed the stamps in the cut-out spots and then picked them up with a plate on my Stamparatus. Each lady was then able to ink the stamps and stamp all items at once. The Mint Macaron jar lids had to be done separately. The butterflies and the lid with holes in the top came from the Ronal...

Flowery Thank You

Image
I was able to use this designed paper so that both side could be seen, much as I did in a previous post with another sheet. It was my first attempt and I didn't think I was that fond of this card but it has grown on me, especially since one of my customers raved about it. This card also utilizes the Share What You Love Suite. I did use half an old doily behind the oval focal point and added one of the colored pearls from the Share What You Love Suite. Products Used: Love What You Do photopolymer stamp set (13), 148042, $21.00 Rich Razzleberry 8-1/2" x 11" card stock (24), 115316, $8.50 Whisper White 8-1/2" x 11" card stock (40), 100730, $9.00 Basic Black 8-1/2" x 11" card stock (24), 121045, $8.50 Rich Razzleberry Classic Stampin' Pad, 147091, $7.50 Tuxedo Black Memento Pad, 132708, $6.00 Share What You Love Artisan Pearls (100), 146927, $6.00 Banner Triple Punch, 138292, $23.00 Layering Ovals Framelits (15), 141706, $35.00

Barbecue, Anyone?

Image
Masculine cards are not the easiest to come up with, and yet they are frequently needed. Now I know Father's Day is past, but we made this card at my May class. I was thinking of Father's Day when I designed it but my father has long been deceased. So I simply made it a masculine card and allowed the one class attendee who still has a father to add the word "Dad" on the apron pocket but used an enamel shaped heart (leftover) to fill in the gap.  I did add a banner saying "Happy Father's Day" and wrote a note inside for my husband. I have to admit that my customers were very sad to use this side of the Share What You Love specialty designer series paper since the other side was so very pretty. But this side is so great for masculine cards. Plus I was trying to introduce some of the new colors and chose to use the Shaded Spruce to make the design pop. The apron is from the Apron of Love stamp set, but the Apron Builder Framelits make it so easy to make...

Using Both Sides Again

Image
I CASEd this card after seeing a video on how to use both sides of the Designer Series Paper, especially that of "Share What You Love" specialty dsp.  You won't see the reverse until you open the card. So I cut my card base at 5-1/4" x 5-1/2". Scoring at 4-1/4" gave me the standard size card. I then added a strip of Basic Black under the inch-wide portion of the card base before attaching a 4" x 5-1/2" piece of designer paper. When the card is opened, you see the reverse design. And remember, this particular paper has an extra special touch—a translucent, pearlized finish. Because I wanted to send an appreciation card to my "shepherd" at Community Bible Study, I added the letter I ("Make a Difference" stamp set) to the saying from the "Love What You Do" stamp set. The flowers on this card are also from the "Make a Difference" set. I was surprised when I discovered the "Stitched Shapes" framelit...

Sweet Cupcake meets Sale-a-Bration

Image
I fear I haven't used this great stamp set, Sweet Cupcake, as much as I should have because it is now retiring. I am so sorry to see it go. I recently designed this card using the Springtime Foils Specialty Designer Series Paper from the Sale-a-Bration flyer. I just love that paper! I had thought I would make it masculine by using the blues, but it still looks feminine to me. The card base is Marina Mist and the inks are, I believe, Soft Sky, Pool Party and Marina Mist. The cupcake paper is actually cut from a copper foil sheet, as are the word "wish" and the spirals across the bottom. The coordinating Cupcake Cutouts Framelits Dies, which include the words "sweet" and "wish", are retiring with the stamp set.

Sale-a-Bration Anniversary Card

Image
In case you hadn't guessed, I have been buying an awful lot of supplies lately. In fact, to acquire this particular stamp set for free, I had to spend $100.00. When I used the various images in this set, I put them all on one clear block. I do wish the "anniversary" was a little higher up, but it still works. As I tried to decide on a background for this stamp, I decided the Fresh Florals designer series paper was perfect. Berry Burst is one of my favorite colors, so I chose to use those coordinating items for this card. Products Used: Happy Wishes rubber stamp set (16), W 147224; C 147227; free with $100 purchase Berry Burst 8-1/2" x 11" card stock (24), 144243; $8.00 Whisper White 8-1/2" x 11" card stock (40), 100730, $9.00 Fresh Florals 12" x 12" Designer Series Paper Stack (40), 144131, $22.00 Berry Burst Classic Stampin' Pad, 144083, $6.50 Berry Burst 3/8" Metallic Edge Ribbon (10 yards), 145489, $7.00 Lots of Lab...

More Eclipse Technique

Image
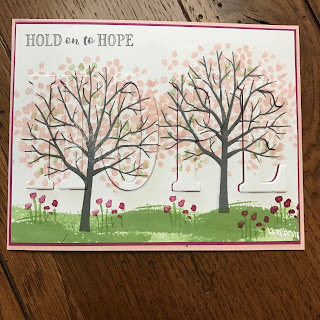
I had promised my faithful customers that I would teach the eclipse technique to them at my February class. I debated and debated how I would do so. Using the Large Letters framelits means I can only use words of four or fewer letters. The greeting on this card is from the Hold on to Hope stamp set. I used the verse that comes with the set (Isaiah 46:4) on the inside. It is a perfect verse for a couple mothers with prodigal sons. One is my daughter, whose son is what I term AWOL because he has turned his back on God and family, refusing contact with any of us. Very painful. But this card is cheerful and the blossoms on the tree speak of the hope of spring during winter. In a sense, these women are going through a winter season emotionally, but spring will come as we put our faith and trust in God. Yesterday's post has the instructions for this technique, so be sure to check it out. Products Used: Hold on to Hope rubber stamp set (10), W 145776, $29.00; C 145780, $21.00 ...

Eclipse Technique

Image
I have been wanting to play with the eclipse technique forever! Because the first cards I saw using this technique were made with the Large Letter Dies, I thought I had to obtain them before I could do the technique. But not so! Since I ordered them, I've seen other examples of this technique done with various shapes. Anyway, this birthday card is my first attempt and I love the way it turned out. The man who turned 80 last week also loves birds, so the Flying Home stamp set seemed a perfect fit. I mixed it with the Number of Years stamp set and used the Large Numbers Framelits for the 80. He was suitably impressed. And of course I had to use the Stampin' Blends to color the images! [You need to use the Memento ink pad with the alcohol-based Stampin' Blends.] The way I accomplished this technique, whether it's the official way or not, was to stamp my design on the 3-3/4" x 5" Whisper White card stock. Then I placed the framelits where I wanted them and ran...

Cool Treats

Image
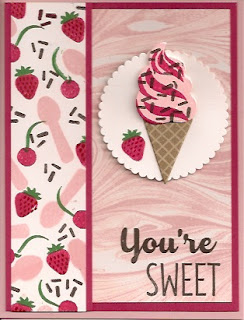
It's summertime and ice cream is a must! What better, non-caloric way to indulge than with the Cool Treats stamp set? My July stamp class attendees made this card. Although we only converted a single strip of Whisper White card stock into designer paper, I would stamp a larger piece and then cut it into strips if preparing to make a number of cards. We also used the Marbled background stamp. I love it! And it goes so well with the swirled ice cream cone. With my catalog open to page 82 where the Cool Treats stamp set is pictured, I'm noticing the swirled frosting in the Sweet Cupcake stamp set. That, too, would be great with this background. In fact, I can see that background as water or sky for boats or airplanes or birds or... You get the idea. Trick:   Use grid paper beneath your work. Keep the background stamp rubber side up while inking it. Leave it that way, place your card stock on top and fold over the grid paper while applying smooth pressure to the card stock. You...

Heartland Stamp Set for Masculine Cards

Image
As I age, there seems to be a greater need for sympathy and thinking of you cards. My cousin, David, a couple years older than I am, was recently diagnosed with a form of Alzheimer's where he will lose his ability to speak. He's also finding he has to give up his beloved woodworking because he's more prone to accidents. Then there's a distant cousin who was diagnosed with bladder cancer, a different form from mine. He had his bladder removed (thankfully, I am now cancer free). Difficult times, probably somewhat scary. Both men know how to lean on God as they walk these challenging paths. Anyway, I made essentially the same card for both men. And I experimented with this stamp. I think the result looks somewhat like watercolor, but in reality I used my sponge daubers to add the color. It also gives the barn a slightly old and faded look. I realize, however, that I put the embossed piece on backwards, but it still looks good. Note: it's important to cut the ova...

Number of Years Stamp Set

Image
I have not used this set in a while and I don't know why. I always love the cards made with it. But it seems I only pull it out when there's a special birthday to celebrate, like my friend Nancy's 80th birthday. She goes to our church and her husband is planning a big party for her. So excited to share in the celebration for such a sweet woman! For this card I worked in a lot of In Colors. Everyone seems to love the Lemon Lime Twist, but I wasn't so sure. However, it was perfect for this card. I used two of the In Colors introduced last year (Dapper Denim and Sweet Sugarplum) and two new ones (Berry Burst and Lemon Lime Twist). I'll let you in on a little secret: I apparently had some ink on my thumb and left a tiny smudge on my artwork. I didn't want to ruin all my work, so I pulled out a Dapper Denim Enamel Shape (the heart) and covered it up. Who would guess I hadn't planned that all along? And this card also gave me a chance to use the new Mini Sta...

Heartland Stamp Set

Image
I bought the "Heartland" stamp set specifically for the little boy with his geese. The image just appeals to me. I like the other images, too, especially the barn. But the boy is tops with me. So I set about designing a card with that design in mind and had great fun framing the image after I water colored it. I have started heat setting my Archival Ink to be sure it won't bleed at all. Usually there is no problem, but some colors seem to cause bleeding (mostly yellows, it seems). My primary colors are Emerald Envy and Dapper Denim. And I'm loving the "Layered Leaves" 3D Dynamic Textured Impressions Embossing Folder! In fact, I now have all the 3D folders except "Ruffled". Eventually. That one reminds me of a tiled roof. I used Powder Pink for the boy's skin and a few highlights on the geese, taking care not to get too much ink on my Aqua Painter.  It's important to cut the circle from the Emerald Envy card stock using the embossi...

Setting Sun

Image
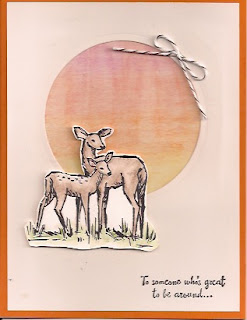
Another technique from my watercolor class is a setting sun. The colors for this surprised me: Daffodil Delight, Pumpkin Pie, Real Red and Rich Razzleberry watercolor pencils. Once again, your brush strokes with an Aqua Painter run from the lightest color to the darkest. The class used the Birthday Fiesta stamp set with its coordinating Framelits, neither of which I possess. So I chose to do some more fussy cutting after watercoloring the deer from the stamp set, In the Meadow. And our Paper Snips make fussy cutting so easy because the tips are precision-ground so they cut to the end of the blades. Products Used: In the Meadow rubber stamp set (8), W 140751, $28; C 140754, $20.00 Pumpkin Pie 8-1/2" x 11" cardstock (24), 105117, $8.00 Shimmery White 8-1/2" x 11" cardstock (10), 101910, $8.00 Basic Black Archival Stampin' Pad, 140931, $7.00 Watercolor Pencils (13), 141709, $16.00 Aqua Painters (2), 103954, $17.00 Early Espresso Baker's Twine (disc...

Botanical Builder

Image
Still playing with the Botanical Gardens Bundle! For this card, I did not use the Botanical Blooms stamp set; everything was cut using the Botanical Builder Framelits Dies. The flowers are each anchored with brads rather than adhesive (yes, the black brad is discontinued). Although the color of the cardstock and the yellow used in the dsp is Hello Honey, I find the Crushed Curry close enough to use those Candy Dots inside the brad base. I never would have thought to use the Mint Macaron cardstock if it hadn't been used in the dsp, but I love the result! Products Used: Birthday Blossoms stamp set (8), W 139167, $27.00; C 139471, $19.00 Botanical Builder Framelits Dies (14), 140625, $33.00 Botanical Gardens 12" x 12" Designer Series Paper (12), 140583, $11.00 Mint Macaron 8½" x 11" cardstock (24), 138337, $7.00 Hello Honey 8½" x 11" cardstock (24), 133643, $6.50 Cajun Craze 8½" x 11" cardstock (24), 119684, $6.50 Archival Basic Black...

Love this Teapot!

Image
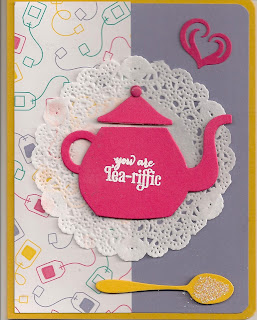
Being the tea-drinker that I am, I just had to order "A Nice Cuppa" stamp set with its accompanying "Cups & Kettle Framelits Dies" and "Have a Cuppa Designer Series Paper Stack".  This card uses only one stamp from the set but the teapot, spoon and heart are framelits. If you look closely, you will see that I sprinkled some Dazzling Diamonds glitter on the spoon to look like sugar. A fun card that I've made into a belated birthday card by using a verse from an old birthday greeting set inside. I also rounded the corners on one side of this card using our old punch, but you could use the Project Life Corner punch (135346, $8.00) for slightly larger rounded corners. Products Used: A Nice Cuppa stamp set (11 photopolymer stamps), 140683, $17.00 Cups & Kettle Framelits Dies (12), 140624, $29.00 Have a Cuppa Designer Series Paper Stack (48 sheets 6" x 6"), 140567, $8.00 Crushed Curry 8½" x 11" cardstock (24), 131199, $7.0...

More Christmas Tags

Image
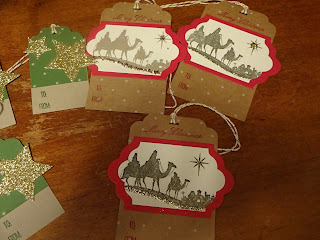
I've been super busy trying to sort through unused cards (I have to admit I have more than any one person can possibly use) in hopes of selling some of them at the Christmas Bazaar. And in the midst of all that, I've been stamping and punching and threading more gift tags to sell. Here are a few of them: They are all using retired cardstock. The wisemen are from a discontinued stamp set, but the snowmen are current. The stars are Gold Glimmer Paper cut with framelits.  Such fun! I've made so many Christmas gift tags that if they don't sell, I'll be set for years!