Posts

Showing posts with the label Big Shot

Super Simple Christmas Cards
Image
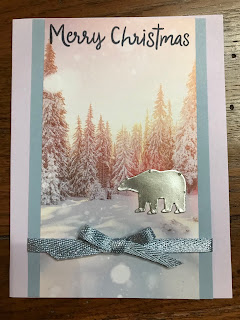
The Feels Like Frost dsp is so pretty, it can stand alone. And that's how I used it for these cards. Stamp the greeting, either directly on the paper or on a banner, add a cut-out and the design is complete. An easy way to churn them out. I used the bears from the Snow Globe Scenes on these cards, but the deer would work, too. Add some ribbon for a little extra pizzazz. Products Used: Snowman Season photopolymer stamps (12), 150458, $18.00 Feels Like Frost 6" x 6" Specialty Designer Series Paper (48), 150444, $14.50 Whisper White 8-1/2" x 11" card stock (40), 100730, $9.75 Purple Posy 8-1/2" x 11" card stock (24) 150881, $8.75 (upper card) Seaside Spray 8-1/2" x 11" card stock (24), 150883, $8.75 Silver 12" x 12" foil sheets (2), 132178, $5.00 Pretty Peacock 8-1/2" x 11" card stock (24), 150880, $8.75 (lower card) Seaside Spray Metallic Ribbon (10 yards), 150446, $7.00 Night of Navy Classic Stampin' Pad...

No Stamps, Just Snow Globe Scenes Dies!

Image
No stamping is needed for this card, a great masculine card which would also be perfect for Christmas. My plaid dsp is left over from several years ago, but since we have more plaid paper in our holiday catalog, I figured it would work. Any class attendees who wish to duplicate it can do so with the current plaid (Wrapped in Plaid), just tweaking the colors to coordinate. In fact, you'll notice that in my samples below, I used two different plaids because there wasn't enough to go around to everyone in my class. The deer and pine trees are cut-outs from the Snow Globe Scenes Dies. I'm continuing to use up old embellishments, too, but my regular class attendees don't mind.  Because the dsp is 6" x 6", I have decent sized scraps left over after cutting the background paper into 3-3/4" x 5" pieces, so we simply applied glue to the envelope flap, adhered the dsp and trimmed it to fit. Current Products Used: Garden Green 8-1/2" x 11" c...

Anchored

Image
There is something about the anchor in the Sailing Home stamp set that really appeals to me. Although my card looks quite different, I took my idea for it from one of the samples on page 144 of the annual catalog. I had some fall dsp (Nature's Poem) that reminded me of a sandy sea bottom and so I used that and chose my colors around it. Products Used: Sailing Home rubber cling stamps (12), 149457, $24.00 Smooth Sailing Dies (12), 149576, $32.00           Sailing Home Bundle (stamps and dies), 151066, $50.25 Cajun Craze 8-1/2" x 11" card stock (24), 119684, $8.75 Soft Sea Foam 8-1/2" x 11" card stock (24), 146988, $8.75 Shaded Spruce 8-1/2" x 11" card stock (24), 146981, $8.75 Crumb Cake 8-1/2" x 11" card stock (24), 120953, $8.75 Cajun Craze Classic Stampin' Pad, 147085, $7.50 Shaded Spruce Classic Stampin' Pad, 147088, $7.50 Very Vanilla Thick Twine, discontinued

Anchored in the Storms of Life

Image
We all encounter storms in our lives and the Sailing Home stamp set includes a great sentiment for someone who is going through a rough time. And this works for men while so many of the "thinking of you" type cards are flowery and more for women. I thought this piece of the original Fresh Florals Designer Series Paper looked a little like seaweed, which is why I chose it for the front of this card even though it is discontinued. All the stamping is done in Night of Navy but I used a little Pool Party and a Blender Pen to color the water and even the sky. Products Used: Sailing Home rubber cling stamp set (12), 149457, $24.00 Smooth Sailing Dies (12), 149576, $32.00           Sailing Home Bundle: 151066, $50.25 Night of Navy 8-1/2" x 11" card stock (24), 100867, $8.75 Whisper White 8-1/2" x 11" card stock (40), 100730, $9.75 Night of Navy Classic Stampin' Pad, 147110, $7.50 Pool Party Classic Stampin' Pad $7.50 Blender Pens (3), 10...

Sailing Home Lighthouse

Image
This card is one of the first ones I designed with the Sailing Home stamp set. It's another one of those that I didn't like at first but it grew on me. I haven't used the rope die often, but it really impresses me. I also like the banner die with it's 3D look and stitched edges. It's just that I have so many thank you cards and need so many birthday cards. Yet I love the font used on the "Thanks" included in the set. It fits the theme of the stamp set so perfectly. Note: I used Stampin' Dimensionals behind the dry embossed Pacific Point card stock and behind the lighthouse. That meant I needed dimensionals behind the tails of the banner across the lighthouse. Products Used:  Sailing Home rubber cling stamp set (12), 149457, $24.00 Smooth Sailing Dies (12), 149576, $32.00           Sailing Home Bundle (stamps and dies), 151006, $50.25 Crumb Cake 8-1/2" x 11" card stock (24), 120953, $8.75 Pacific Point 8-1/2" x 11" card st...

Sailing Home to Waterfront!

Image
I just had to combine the Waterfront stamp set with the new Sailing Home set! And I love the way it turned out. I stamped the mountains in the back with both Soft Suede and Shaded Spruce, stamping front mountains and then, without re-inking, stamping the back mountains. Because the Sailing Home stamps are rubber, after stamping the boats in Soft Suede, I used a Blender Pen to remove the ink beneath the boats and then colored the stamps with a Pacific Point Stampin' Write Marker. Products Used: Waterfront photopolymer stamp set (16), 146386, $17.00 Sailing Home rubber cling stamp set (12), 149457, $24.00 Smooth Sailing Dies (12), 149576, $32.00           Sailing Home Bundle:  151066, $50.25 Pacific Point 8-1/2" x 11" card stock (24), 111350, $8.75 Whisper White 8-1/2" x 11" card stock (40), 100730, $9.75 Soft Suede Classic Stampin' Pad, 147098, $7.50 Shaded Spruce Classic Stampin' Pad, 147088, $7.50 Pacific Point Classic Stam...

Sailing Home Lighthouse

Image
I am so far behind on my blogging that I'm posting about cards I made for a class a couple months ago.  I love the Sailing Home Stamp set and designed a number of cards with that set. This is just one of them. I had some designer series paper left from last year's color family paper stacks and incorporated a strip of that in this card.  There is something so appealing about light houses. And sea gulls. I love watching those feisty creatures. I had one in my driveway while my granddaughters and I were filling the bird feeder. I left the bin of seed on the driveway and we stood silently to watch him. They are such thieves by nature. So he crept up near the seed bin, then rushed in and took some seed and rushed away. He then acted like he hadn't done a thing. So funny. Products Used: Sailing Home rubber cling stamp set (12), 149457, $24.00 Smooth Sailing Dies (12), 149576, $32.00           Sailing Home Bundle (dies and stamps), 151006, $50.25 Wh...

Snow Front for Thanksgiving

Image
I was so surprised when I realized the Snow Front doesn't have to be about snow! I used the cluster of dots that I'm sure are supposed to be snow flakes to serve as colored leaves on the trees. But I thought the scene I created was perfect for Thanksgiving so I borrowed the greeting from the retired Pleasant Pheasant stamp set. Products Used: Snow Front photopolymer stamp set (17), 150483, $22.00 Pleasant Pheasant retired stamp set Balmy Blue 8-1/2" x 11" card stock (24), 146982, $8.75 Cherry Cobbler 8-1/2" x 11" card stock (24), 119685, $8.75 Very Vanilla 8-1/2" x 11" card stock (40), 101650, $8.75 Balmy Blue Classic Stampin' Pad, 147105, $7.50 Cherry Cobbler Classic Stampin' Pad, 147083, $7.50 Basic Gray Classic Stampin' Pad, 149165, $7.50 Shaded Spruce Classic Stampin' Pad, 147088, $7.50 Call Me Clover Classic Stampin' Pad, 147139, $7.50 Soft Suede Classic Stampin' Pad, 147115, $7.50 Retired Cherry Cobbler...

Thankful Beauty & Joy

Image
Beauty & Joy is another of those stamp sets that is so versatile because it can be used for all seasons. This card, made at my October class, includes quite a bit of dry embossing. It's difficult to see the Pinewood Planks embossing on the Early Espresso card stock. Actually, I had originally designed the card using Soft Suede but cut Early Espresso for the class instead. It still looks good but, truth be told, I much prefer the original with the Soft Suede. But I have already given that one away without photographing it. That first one was a birthday card while this is a Thanksgiving/thank you card. I've actually used one of these, too. Products Used: Beauty & Joy photopolymer stamp set (13), 150518, $16.00 Very Vanilla 8-1/2" x 11" card stock (40), 101650, $9.75 Pumpkin Pie 8-1/2" x 11" card stock (24), 105117, $8.75 Crushed Curry 8-1/2" x 11" card stock (24), 131199, $8.75 Early Espresso 8-1/2" x 11" card stock (24), 11...

Floating Frame Technique with Hold On to Hope Stamp Set

Image
This set of cards was made without the Press 'n Seal.  I do think that if I had made the card base Whisper White just like the frame, it would have looked more like it was floating. I believe it was an Australian demonstrator who demonstrated this technique using removable adhesive. And, no, Stampin' Up! does not carry removable adhesive, so you have to purchase it at a craft store. However, you could always use your SNAIL adhesive and rub away most of the stickiness, but if your pieces are fragile, you might tear them in the process. Yesterday's post used two of our retiring In Colors and today I'm using another. The Fresh Fig makes this card absolutely exquisite. At least I think so. With this set, I was able to die cut all the elements before attaching them to a 4" x 5-1/4" piece of card stock, using removable adhesive. I then used my Rectangle Stitched framelits Dies to cut a rectangle from the center. Next I peeled each element off, one at a time, ...

Floating Frame Technique with Tea Together Stamp Set

Image
I think I must have watched every video produced on how to make a card that looks like it has a floating frame.  Jennifer MacGuire apparently created the technique using Press 'n Seal paper. That trick does make it easy to transfer the elements, but I struggled every time to peel off the Press and Seal without removing the top layer of my cardstock, taking the color with it. So I had to add more color with my markers after I'd finished. Plus there is a certain sticky film that remains behind on my card stock. I eventually came up with my own way of doing it, but the cards I'm showing here were my first ones and used the Press 'n Seal. They look great in spite of my struggles (just don't look too closely). I stamped and colored the flowers from the Tea Together stamp set and then die cut them. Next step was to arrange them on a 4" x 5-1/4" piece of card stock which was later discarded. Then I laid a piece of Press 'n Seal over the top, pressing it...

Peter Rabbit Wishes You a Happy Spring

Image
I don't know what it's like where you live, but here in Western New York we have spring one day and winter the next. Or so it seems. We'll be in the 60s tomorrow but dropping temperatures and snow in Sunday's forecast. So "Happy Spring" is a very nice wish! I fell in love with the Fable Friends stamp set as soon as I saw it in the Occasions Catalog but wondered if it wasn't more for baby cards than anything else. It is definitely sweet and could surely be used for such cards; in fact, the stamp that says "darling baby" makes it especially so. But the other greetings make this very versatile. Add the Gingham Gala Designer Series Paper, and I'm in seventh heaven, so to speak. I've always loved gingham and I'm so happy Stampin' Up! added this 6" square paper to their product line. I hope they keep it coming in the next annual catalog.  I even added the Gingham Gala sequins. The fact that they are adhesive-backed doesn't ...

Favorites with Tea Together

Image
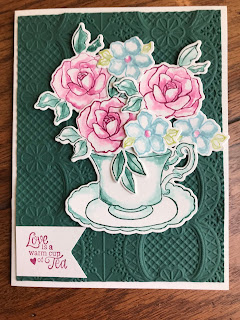
Today I'm sharing two of my very favorite cards - at least at the moment. We made the top card at my February card class and I taught them the blender pen technique used here to add some color to the images without completely filling them in. I'm loving that technique! I got the idea for these cards from the sample on page 49 of the Occasions catalog. I studied the picture long and hard before I figured out how the images were colored. I think I figured it out correctly... The way I taught my class was to stamp the image in the color we want. The flowers all had two colors, one for the blossom and one for the leaves, so we used our markers to color the rubber stamps. I used some of my acrylic blocks as well as my silicone craft sheet to hold ink so ladies didn't have to wait for access to the ink pad. I love that ability!  All I do is tap the blocks against the ink pads to pick up the ink or rub the ink pads along the surface of the silicone sheet (I could put several c...

Simple Elegance

Image
Since we made two rather fussy cards at my last stamp class, I knew I had to have a couple easier cards. This is one of the two (the other was in my previous post using the Tea Together stamp set). I fell in love with the Delicate Lace Edgelits in our annual catalog and only recently purchased them. I have now used all three of them for they each have their own mood but add that extra touch to the cards made with them. For this card, I used the edgelit on my card base before folding on the score line—it's so much easier to keep the die in place when the card is flat. I then put a strip of Highland Heather card stock behind the "lace". To do this, I line the contrasting piece up with the back of the card after running a strip of Snail down the left and applying a few drops of glue behind the lace. Once it is lined up with the outer edge, I merely fold the card and press. Voila! Perfect alignment. I used a blender pen to color the blooms. After stamping the greeting...

Yet Another Poinsettia Card

Image
Looking through my abundant supply of discontinued designer series paper, I designed a final card using the Peaceful Poinsettia bundle. I think I made and gave or sent over 100 cards this year, so I had quite a variety that went out. Several posts back, I shared super simple designs that helped me crank them out. They, too, used discontinued dsp. I had thought this particular dsp was rather busy and had struggled to use it even though I used most of the rest of that pack. However, it was perfect for this card. After adhering the holly leaves with berries to the card, I colored them in with my Stampin' Blends, although I could have used the coordinating markers. I guess I've just gotten into the habit o fusing my Blends even before picking up my markers! I used the open die on the dsp and then cut the detailed flower from Basic Black cardstock using both the open and the detailed thinlits together. Even the holly and berries were cut from Basic Black. I've been using a l...

Still More Peaceful Poinsettia Bundle

Image
My class in early December featured the Peaceful Poinsettia bundle, in case you hadn't figured that out by all the posts using this set. I am so glad I purchased this set! I saw something similar to this card on-line (stampingsmiles.com) and loved it. I did not yet have the Delicate Lace Edgelits that she used, but they have since arrived and I will be showcasing them in the very near future!  So I used the curved Framelit from the "In the Woods" set. My leaves are different and I added the Gold Metallic Thread. After cutting out the holly leaves, I trimmed them down to exclude the berries.  All these delicate cuts were made with adhesive sheets on the back of my cardstock. If you look closely, you will see that my flower is raised up with Stampin' Dimensionals. Products Used: Peaceful Poinsettia rubber stamp set (7), W 147784, $29.00; C 147781, $21.00 Detailed Poinsettia Thinlits Dies (8), 147925, $33.00      Bundle, stamps & dies: W 149964, $...

Peaceful Poinsettia Bundle

Image
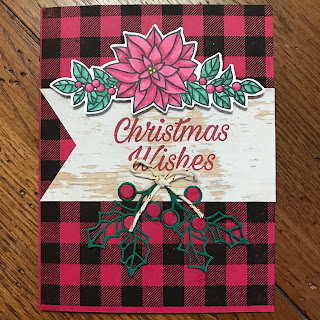
This bundle is just too much fun! For this card I mixed my favorite Lovely Lipstick with Shaded Spruce and Early Espresso, although everyone thinks my checks are stamped in Basic Black. I had fun figuring out how to make a card using the cut-out, stamped poinsettia. I love the result. Thankfully I used the Stamparatus for the Buffalo Check background. With the grid sheet to protect its base from ink, I was able to line up the background stamp on the open card so it would not extend past the score line. Then, when I didn't get an even transfer of ink, I could just do it again with perfect alignment. Products Used: Peaceful Poinsettia rubber stamp set (7), W 147784, $29.00; C 147781, $21.00 Detailed Poinsettia Thinlits Dies (8), 147925, $33.00      Bundle (stamps & dies): W 149964, $55.75; C 149962, $48.50 Buffalo Check rubber background stamp, W 147797, $20.00; C 147794, $15.00 Lovely Lipstick 8-1/2" x 11" cardstock (24), 146970, $8.50 Whisper White 8-...

Peaceful Poinsettia stampset and Detailed Pointsettia Thinlits Bundle

Image
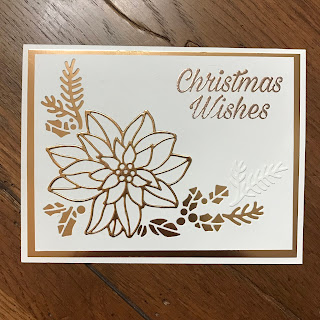
I love the poinsettia yet found myself reluctant to order the poinsettia bundle in the Holiday Catalog  because I have so many Christmas sets that have been discontinued. I finally gave in and have had so much fun creating with it! Because of the shape and size of the corner thinlit, there aren't too many options for card fronts when using the corner piece. The variety, I think, comes from what you place behind it. Below are two variations of the same format. The first card is done in Whisper White with Copper foil behind the cut-outs and Copper Stampin' Emboss powder for the greeting. Unwilling to waste the boughs cut from the Whisper White card stock, I simply added them on the card front for added texture. The thinlits include an open frame for the poinsettia as well as an intricate thinlit.  In order to achieve the large poinsettia, you need to use both. The intricate piece fits nicely inside the open framelit so you can run them both through the Big Shot at t...

Lovely as a Tree with Wood Textures

Image
A man from our former church was diagnosed with a brain tumor and I needed to send him a card right away. This one came together quickly and easily. The sad thing is that he has been the caregiver for his wife who is legally blind and losing what sight she has left. Admittedly, when I first saw this particular wood texture design my thought was, "How would I ever use this?" But I love it! And now wish I hadn't used all the sheets up using the reverse side. Products Used: Lovely As a Tree rubber stamp set (6), W 128655, $28.00; C 127793, $20.00 Flourishing Phrases rubber stamp set (18), W 141531, $49.00; C 141534, $37.00 Whisper White 8-1/2" x 11" card stock (40), 100730, $9.75 Basic Black 8-1/2" x 11" card stock (24), 121045, $8.50 Wood Textures 6" x 6" Designer Series Paper (48), 144177, $11.00 Mossy Meadow Classic Stampin' Pad, 147111, $7.50 Stitched Shapes Framelits (12), 145372, $30.00 Layering Squares Framelits (19), 141...

Botanical Tags Thinlits

Image
I am making a conscious effort to use that gorgeous designer series paper I so readily purchase! Choosing my paper before actually designing the card allowed me to choose my colors accordingly. Originally I wasn't sure I was going to like the new core color, Mango Melody, but this paper made me love it! I purchased the Botanical Tags Thinlits without the stamp set because I think they are so versatile. I really thought I wanted to make a bookmark with them (and I did make one as a gift for those who placed orders at my stamp class). But I thought the birds fit very nicely with the flowers on the paper. I also decided that with two birds, this card would make a great anniversary card, even though this one is a birthday card.  Products Used: Best Birds photopolymer stamp set (13)147136, $21.00 Mango Melody 8-1/2" x 11" card stock (24), 146989, $8.50 Night of Navy 8-1/2" x 11" card stock (24), 100867, $8.50 Garden Impressions 6" x 6" Designer S...