Posts

Showing posts with the label Gift and Decor Ideas

Christmas Gifting Class

Image
Click on the image below to enlarge it and read about my upcoming Christmas class using Stampin' Up! products.

Quilt Blocks

Image
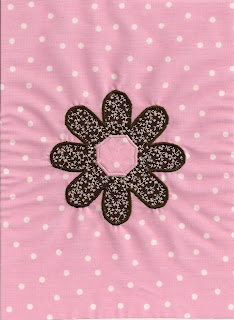
I am making a crib quilt for my granddaughter. Some of the blocks have flower appliques on them. The unique thing about these is that I cut the fabric with my Big Shot and the Flower Folds die. I have two tips to offer anyone who is interested in trying it themselves, tips learned the hard way: 1.) It is worth going to the quilt shop to purchase high quality fabric even if you pay more. The weave is tighter, enabling you to applique without puckering the fabric. Also, I fear that after all my work the fabric will just pull apart with multiple washings - necessary with a crib quilt. 2) Use the modern method of applying your fabric to the quilt block. I don't know why I reverted to the way I originally learned to applique when I've used the "wonder under" to fuse fabric together and applique before. However, I backed my block with interfacing, basted the flowers on and then zigzagged them. After all the basting, I didn't want to try to match the wond...

Fabric Purse

Image
Remember, our Big Shot cuts fabric as well as card stock and chipboard, etc. This purse was made by Christine Luce using the Scallop Square bigz clear die. Just think how quickly you could make a raggedy quilt or jacket using the Big Shot. Quickly cut stacks of squares and piece them together. Not trimming! The scalloped edge can be on the inside or the outside. You could even make a warm winter scarf using flannel or wool fabric.

Christmas Gift

Image
I know it's hard to see this picture, which is what I received at our demonstrator team Christmas party. It was designed by Tina Newton and includes our Filigree Brads on the limbs of the tree as well as a bow made with our Real Red Polka-Dot Grosgrain Ribbon. I tried to enlarge it, but it became very blurry, so I hope you can get an idea of what it looks like anyway. The banner across the bottom reads, "The season of friendship lasts forever". Both the tree and the saying are from the "Season of Friendship" stamp set.

Joyful Giving!

Image
Thursday night was our Stampin' Up demonstrator team Christmas party, including a gift exchange. This is what I made. My gift was actually an experiment that worked. I bought a small plate at TJ Max, stamped snowflakes from the Serene Snowflakes stamp set (Holiday Mini Catalog expiring January 5) with Bordering Blue Craft Ink. I then sprinkled clear embossing powder over the ink and set the plate in the oven at 250 degrees for 10 minutes. I wasn't sure if the plate would survive the oven or not, which is why I kept the temperature down, but it did take a while for the embossing powder the melt. After the plate cooled, I applied JOY from the Holiday Mix Decor Elements, also in the Holiday Mini Catalog. I included a plate stand with a red ribbon, but thought the dish could be used for candy, too, although not dishwasher safe. I have another set of Holiday Mix Decor Elements in Chocolate Chip to use, so I'll be looking for more ideas in the next few weeks. I'm findin...

Ready for Snow!

Image
Spotting this shimmery white frame, I knew just what I wanted to do with my Holiday Mix Decor Elements (117675, $9.95). A flocked sheet of Christmas Cocoa Specialty Designer Series Paper (116770, $11.95) made a perfect backdrop for the word "SNOW", which I applied to the outside of the glass. I had a couple snowflakes left over in chocolate (117674, $9.95) and adhered them directly to the paper. I even used my 2-way glue pen (100425, $3.50) randomly on the designer paper and sprinkled it with chunky glitter (111343, $15.95)! A piece of 1/4" Real Red grosgrain ribbon (109034, $4.95) tied to one side of the frame and another real red snowflake decor element dressed up the frame a little more. I'm going to love keeping it out during the Christmas season and maybe beyond! After all, snow is a winter item...

Purse Boxes and Earrings

Image
Do you need a cute box for a small gift - like a gift card or some jewelry? Try making one of these purses using designer paper and card stock. Or even make your own jewelry, like the earrings shown here in front of the Bravo Burgundy purse. That Top Note die for the Big Shot is so versatile! As you can see, I used that to cut the card stock. The center box and the earrings were taught to me by Kriss Huells at a demonstrator team meeting. For that one, we used the faux alligator skin technique which required lots of clear embossing powder. The others are made with designer paper. The products needed to make the above items are: Big Shot Die-Cut Machine, 113439, $99.95 Top Note Die, 113463, $21.95 Card Stock and coordinating designer paper, pages 155-157 and 160-163 in the 2009-2010 Idea Book and Catalog Ribbon, pages 182-183 Jumbo Eyelets, pewter 108432 or antique brass 108431, $9.95 for approximately 60 eyelets Jumbo Brads, 5/8", 112533, $6.95 for 32, OR Designer Brads, 1125...

Wall Decor

Image
Ever since I bought the Laura Ashley comforter with blue roses, I've been planning to stamp some pictures for the wall above our bed. The room has what my daughter calls a country cottage look, blue with white trim and white eyelet curtains and dark oak furnishings. As always, all my supplies were Stampin' Up (except the frames). I used the stamp set, "A Rose is a Rose" and the following inks: brocade blue, bordering blue, certainly celery, mellow moss, creamy caramel and close to cocoa. I also used stickers and designer paper from the "Love Stories" scrappin' kit. (Sorry about the reflected flash on the larger picture). When I hung them on the wall, I put the 5 x 7 prints on each side of the 8 x 10. I had hoped to include a photo of my artwork hanging on the wall, but I couldn't seem to take a good picture. My husband said it had something to do with the blue walls absorbing all the light. So you'll just have to imagine it. My walls ar...

Beyond Cards

Image
Our demonstrator team Christmas party included a gift exchange with every item made with Stampin' Up products.  I made coasters that were actually a big hit.  I figured that we live in grape country, so the coasters should feature grapes.  So I used the cluster of grapes  from the "Fruit Stand" stamp set.   I'm so sad the set is being retired!  But it's still available through January 18.  And it's 10% off today and tomorrow.  Click on the link to my web site and you can order it on-line.  Or e-mail me right away. I love this "Snow" picture by Linda Jennejahn! Another exciting picture is this one by Jen Burgess: Who would have thought to incorporate a mirror into a decorative frame with Stampin' Up products?  Well, Jen Rios Raner did! Wintry days make us long for hot chocolate!  And Christine Luce designed the perfect way to give cocoa and treats to go with it: Fern Letger made a wonderful card organizer!  I have two pictures for you, one of the ...
Image
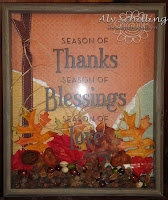
Ever wonder what to do with those holiday oriented decor elements? At our demonstrator team gathering in October, our upline, Aly Schilling, had lots of samples for us. I hope you'll get lots of exciting decorating ideas from her efforts!  I actually won one of the arrangements in the bottom snapshot!