Posts

Showing posts from February, 2011

March 2011 Card Kit of the Month

Image
Click on the image below so you can see it full-sized and get all the information.

More Build a Blossom

Image
Sorry I've neglected my blog this past week. I struggle to photograph my cards and projects because it just seems like so much work to set it up, snap a picture and transfer to the computer. It's so much easier to scan my cards. So I decided to go ahead and try scanning this card, even though it's not very flat. I'm so glad it turned out as well as it did. I think you can still see the dimensional petals. I just love this stamp set and punch! I seem to be fixated on the large flower, but I'm sure I'll eventually branch out. Actually, this card is one that we will be making at my stamp class tomorrow night. Can't wait to share my cards with my stamping friends! Products Used: Build a Blossom stamp set, W 121923, $25.95; C 121994, $18.95 Blossom Petals Punch, 121808, $16.95 Crumb Cake card stock, 120953, $6.95, 24 sheets, 8-1/2" x 11" Very Vanilla card stock, 101650, $8.50, 40 sheets, 8-1/2" x 11" Woodland Walk Designer Series Paper, 11738

Plane & Simple

Image
I'm always in need of masculine cards. Since my husband is a corporate pilot, I had to purchase the Plane & Simple stamp set in the Occasions Mini Catalog. And the card is as simple as the name of the stamp set! To fit the vintage feel of the airplane, I lightly sponged all card stock with Soft Suede ink. Somehow, Soft Suede seems to be perfect for vintage-themed cards. Since I love the vintage look, I use it a lot. Yet, the funny thing is that I don't really like the color by itself. And, of course, the tearing is another technique that adds to the aged appearance. Products: Plane & Simple stamp set, W 121903, $21.95; C 121964, $16.95 Big Shot Die-Cutting Machine, 113439, $99.95 Square Lattice Textured Impressions Embossing Folder, 119976, $7.95 Naturals Ivory card stock, 101849, $7.50 for 40 sheets, 8-1/2" x 11" Soft Suede card stock, 115318, $6.95 for 24 sheets, 8-1/2" x 11" Marina Mist card stock, 119682, $6.95 for 24 sheets, 8-1/2" x 11&quo

Three Elements of Style

Image
Once again I'm working in threes! I wanted to play around with the Elements of Style stamp set in anticipation of spring and summer. Right now the wind is blowing and the snow is almost melted and I'm ready for winter to step aside and let spring shine through! This morning I happened across an "avalanche" (for want of a better word). I was thankful I was heading north on Route 332 because if I'd been in the southbound lane, I would have had to drive through the muddy median like the other cars were. I would have feared getting stuck in the mud! Anyway, in the process of melting, the snow on the bank along the side of the road slid off and into the southbound lanes. Too deep for anyone to try "plowing" through! Anyway, using in colors and soft suede, these are the cards I came up with. The first one consists of just one half sheet of card stock—no layers, no embellishments. I stamped the image with Soft Suede ink on the Blushing Bride card stock after ru

Using Leftovers

Image
My daughter is always in need of baby cards, so I decided to whip up a few. In my box containing the Animal Stories stamp set, I found three stamped and assembled giraffe images that were leftover from card swaps I made for the Syracuse Regional that wasn't (snow storm last February). I decided take the easy route and incorporate those pieces in my designs. It's difficult to see, but I used the tiny dotted side of a sheet of Pear Pizzazz designer paper for the background of the first two cards. For the second card, I paired it with the texture embossed solid Pear Pizzazz card stock. I thought the Pear Pizzazz nicely complemented the Pumpkin Pie giraffe. The three words, "sweet", "little", and "one" are individual stamps in the Fundamental Phrases stamp set. To align the words more easily, I put all three clear-mount stamps on one acrylic block. For the final card, I decided to use a different designer series paper and love the way it turned out! Pr

Amazing!

Image
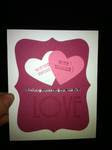
Would you believe my son, who does not believe in the time and money involved in cards that will just be thrown away, made this card for his girlfriend? She sent me the photo from her iphone, which is why it's small. I think he did a wonderful job! It's simple but very attractive. Happy Valentine's Day everyone!

Last Minute Valentine

Image
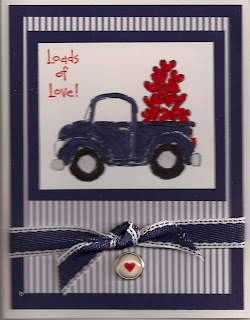
This card is for my son who thinks cards are a waste of time and money. But I figured his girlfriend is now a Stampin' Up! demonstrator, so she would appreciate seeing anything created to be given. In fact, when Andrew's ready to toss his card, she can save the front fo show customers. I stamped this image with Staz-on Jet Black ink and then colored it with markers. I was originally going to use my blender pens and probably should have. Or use my usual method when coloring with markers—emboss the image with black embossing powder and then color with markers. Since I hadn't done that and the dark ink markers have a tendency to cover the black lines of the image, I tried to leave skinny areas uncolored. I think it also helps make this aged pick-up look more battered by time. My colors are Concord Crush, Real Red and Whisper White. Although the brad on the bottom is retired, I understand you can still purchase them from the Clearance Rack. The other retired item used on this c

Valentine Treats

Image
Another holiday laced with chocolate and other sweets! We're barely over Christmas and now we're overdosing on sugar once again. And I'm aiding and abetting. You'll notice that I used the rub-ons Stampin' Up! offered for a limited time on the cello bag toppers and even on one of the bags itself (I'd have done that on all of them if I'd thought of it sooner). But the new twist for candy was the use of the petal cone die as a candy-filled ornament. I should probably have taken an even closer shot of these, but I think you can tell what they look like from this shot. After punching a hole in the front of the cone with the 1-inch circle punch, I backed it with a piece of window sheet. Each scallop frame is somewhat different--one is punched from retired designer series paper, while the others are punched from this year's dsp. However, on one of them, I first stamped the scallop image from the Love You Much stamp set. Punching the center from that with my 1-i

Birthday Combination

Image
This is the last of the collections I'm sharing for now. Below you'll see the pocket-tag birthday party invitation along with a super simple thank you card and a favor box. I made these at Oktoberfest with other demonstrators on our team. I'm just slow uploading them to my blog. I've had plenty of other things to share, though. Notice the use of designer paper to keep things interesting but simple. The thank you card uses our pre-cut and scored Note Cards with a piece of designer paper and "Thanks a Million" stamped in the corner. A ribbon finishes it off. How simple is that? Some of the items used for these projects: Note Cards, 07331, 20 cards and envelopes for $5.95 Celebrations Designer Series Paper 117164, $9.95, 12 double-sided 12" x 12" sheets Bitty Box & Envelope Bigz xl Die, 115967, $42.95 Sweet Treat Cups, 116802, $2.95 for 12

For that New Baby

Image
Here we have an ensemble of stamped items for that new baby! The card on the left will hold a baby picture and all the pertinent information. The favor next to it is perfect for the babys hower. The designer series paper is cut with the Perfect Settings Bigz xl Die, then a washcloth is twisted to fit inside. Add the double scalloped circle with stamped image to a toothpick inserted in the washcloth and you have a great favor. An invitation tag fits perfectly into this diaper-shaped envelope (a close-up is shown below). And, of course, the new mom will need a pack of thank you cards to send out after the shower, so why not make them to match the rest of the shower theme? For these items, you'll need the Nursery Suite Specialty Designer Series Paper, So Saffron, Pear Pizzazz and Whisper White card stock, in addition to the Big Shot, Perfect Settings Die, Scallop Circle Punch and two circle punches. And don't forget the Early Espresso ink and ribbon, both satin and taffeta. Almost

Planning a Wedding?

Image
Today's colors for weddings are so much more spectacular than when I was married 42 years ago! The set before features Rich Razzleberry, Whisper White and Basic Black. There is an invitation with a pocket for all the reception information, a sample thank you card, a reserve-the-date card and even a favor using those colors. Here is the invitation with the "belly band" around it and a close-up of the reserve-the-date card. Actually, I've had these cards in my display packet ever since our Heartfelt Stampers demonstrator team's Oktoberfest but have never photographed them. I find it so much easier to scan cards, that I seldom take the time to photograph and upload things. So I took a few pictures last week that I am going to be loading over the next few days. Overdue, but still viable ideas for your use.

Build a Daisy

Image
This card was going to be a birthday card for my sister-in-law, but I just can't part with it at the moment! I love the way it turned out, although the photo doesn't do it justice. I tried scanning it, which I think shows more detail, but I couldn't get it to lay straight in the scanner. When I came up with this idea, I hadn't realized just how large the daisy would be, but it fits perfectly on the lattice I cut with the Big Shot Lattice die, which gives it a leafy look. There are 20 flower petals which were embossed in white on Whisper White card stock. I stamped the center with Daffodil Delight on the same color card stock, then covered it with Crystal Effects and adding a generous sprinkle of Dazzling Diamonds glitter. Although the designer paper is Pear Pizzazz, the bow is made with Certainly Celery Satin Ribbon, which is a shade lighter than the Pear Pizzazz. You can hardly tell the difference in color. I love the elgant simplicity of this bow. You merely make a lo