My First Paper Pumpkin
I've had this pile of cards sitting by my computer for at least a week now and am finally sharing them with you. I wanted to prepare the contents of my first box from My Paper Pumpkin subscription in more ways than just what was suggested to give you an idea of what you can do with it. If you like what you see, you have time to sign up before the next shipment (before April 10th to receive the April shipment).
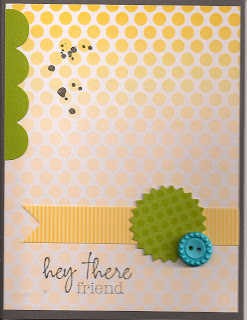
The box came with everything you need to make four cards, including the envelopes. I like the fact that the Basic Gray card base is white on in inside. Plus it came already scored for you. You need to provide your adhesive to attach the designer paper and glue dots for the button, but the other elements are stickers. The two stamps you receive are the words and the ink spots. Plus you receive a small Basic Gray ink pad (Stampin' Spot). This first card is made according to the instructions found in the box.
 For this second card, I rearranged the elements and stamped extra ink spots. Plus I added a bow made with 1/8" Daffodil Delight Taffeta Ribbon.
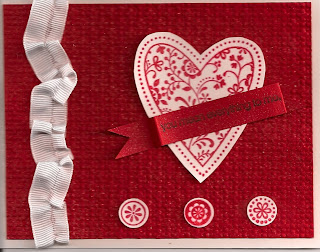
 Although the concept behind My Paper Pumpkin is that you can take the box with you wherever you go and have all the supplies you need to make four cards (just slip your snail adhesive and mini glue dots into your box first), I just had to add my own creativity to the card. On my own, I would never have chosen to use a Tempting Turquoise button as an embellishment, so I decided to tie the color in with a stamp from the Lacy & Lovely stamp set (7 images).
 The final card is a little more playful, using the Morning Cup stamp set (11 images).

The box came with everything you need to make four cards, including the envelopes. I like the fact that the Basic Gray card base is white on in inside. Plus it came already scored for you. You need to provide your adhesive to attach the designer paper and glue dots for the button, but the other elements are stickers. The two stamps you receive are the words and the ink spots. Plus you receive a small Basic Gray ink pad (Stampin' Spot). This first card is made according to the instructions found in the box.


Comments