Posts

Showing posts from October, 2016

Simply Super Simple!

Image
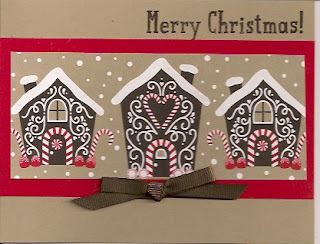
When the holiday catalog first appeared, I searched and searched in vain for the gingerbread house stamp used in the sample card on page 4. Lo and behold, it's simply designer series paper! The houses in that sample were cut from the Candy Cane Lane dsp and affixed to the card front. My card is much more simple. I merely used my paper cutter to cut out a group of three houses, adhered that piece to Real Red cardstock and mounted that on my Crumb Cake card front. Stamped the greeting (Snow Place stamp set) in Early Espresso and added an Early Espresso bow. Yes, the ribbon is retired grosgrain ribbon, but it ties so nicely! And can't forget the clear Wink of Stella I brushed on the snow! Could it be any easier?

Jar of Cheer Christmas Card

Image
I really love the Jar of Cheer stamp set. So many possibilities! We made four cards at my October class using that set and the ideas for more are just tumbling around in my head! For this card, I used the Layering Squares instead of the Everyday Jars Framelits. A doily, some embossing and a few gold enamel shapes and the card is relatively easy and different from the other cards that use a jar. The candle is stamped with Basic Gray Archival Ink so it wouldn't smear when coloring with markers and blender pen. I used Crumb Cake ink and a Blender Pen for the candle, striving for a shaded effect rather than a colored candle. And of course I had to use the Gold Wink of Stella for the candle flame! Products Used: Jar of Cheer photopolymer stamp set (13), 142161, $21.00 Emerald Envy 8-1/2" x 11" card stock (24), 141415, $8.00 Real Red 8-1/2" x 11" card stock (24), 102482, $8.00 Whisper White 8-1/2" x 11" card stock (40), 100730, $9.00 Basic Gray

Jar of Cheer Gift Enclosure Card

Image
October stamp class featured the Jar of Cheer stamp set and included two new techniques. This card is a simple one that we made while part of another card was drying. The card base is one of the Whisper White note cards that come with envelopes, although if I'd had the Crumb Cake note cards I could have eliminated a layer. The Candy Cane Lane designer series paper used on this card is one of the choices for our October special: buy three and get one free. That's $11 savings! This card is especially easy because it utilizes the Everyday Jar Framelits and a half-inch circle punch. The Real Red heart was punched out of card stock using a discontinued punch. I also colored part of a stamp from the Teeny Tiny Wishes stamp set to add the word "Christmas" below "Merry". The Baker's Twine wrapped around the jar and tied in a bow (before mounting on card front with Stampin' Dimensionals) is the gold twine that comes in a three-pack with Garden Green and Che

Twist on Emboss Resist

Image
I was wowed by this technique! In fact, I had a hard time believing it would really work out the way it was supposed to. But it did and my stamp class attendees just loved it. More time consuming than some techniques, but definitely worth it. First we sponged fall colors all over a piece of Very Vanilla card stock. Then we stamped leaves with Versamark and embossed with clear embossing powder. Finally, we used our brayers to roll Early Espresso ink all over the surface, wiping off excess ink with a tissue. Then our images were ready to cut out with framelits. [Admittedly, I used our old style brayer instead of the new sponge brayers.] It is very difficult to see your stamping with VersaMark and therefore easy to overlap your images. Here's a trick I thought of after the fact: Use your large acrylic block and place all the stamp images you wish to use on the same block. Proceed with the technique. Just make sure you apply pressure all over the surface of your block. I have two