Posts

Showing posts from November, 2012
Image
After looking at the Candlelight Christmas Specialty Designer Series Paper, I came up with the idea for this card, another project from my last stamp class. A non-Christmas stamp set that works perfectly for a Christmas card because of the colors chosen. I chose to use the beautiful Lacy Brocade Textured Impressions Embossing folder on the Early Espresso Core'dinations card stock, sanding the surface to bring out the core color. The layers of Daydream Medallions, cut with the coordinating Floral Frames Framelits, are stamped in Raspberry Ripple, Primrose Petals and Lucky Limeade. Here is a close-up of the "flower", which was put together with Stampin' Dimensionals, of course. Products Used: Daydream Medallions stamp set (5), W 126465, $36.95; C 126467, $26.95 Teeny Tiny Wishes stamp set (24), W 115370, $36.95' C 127802, $26.95 Lucky Limeade 8½" x 11" card stock (24), 122926, $6.95 Whisper White 8½" x 11" card stock (40), 100730, $8.

Including Stamped Cookies

Image
Another project we made at my recent stamp class was this cute little "yum" pocket bag to hold a gift of cookies. I even provided the cookies stamped with our cookie stamp! Recipes are included when you purchase our Sweet Pressed Cookie Stamps. The Holidays set of silicone stamps includes a jack-o-lantern face, a snowflake and a heart. Each set comes with a wooden handle and the silicone slips over the flat end. So easy! And the dough doesn't stick to the silicone stamps. The photo below shows off the cookies. The above sample was made with paper from the Brights Collection Designer Series Paper Stacks, but we used Real Red and the Old Olive papers from the Polka Dot Parade dsp for the class. I didn't have enough of the Polka Dot Parade in those colors for everyone at my class. We colored the leaves on the "Yum" stamped image with a blender pen and Old Olive ink. I did use up some of my old retired ribbon on this project. The dsp was cut 6" x

Using it and Loving it

Image
Can't believe I let some of the prettiest designer series paper sit in my bin without using it. Berry Blossoms, from last year's catalog, fits in that category. I have a lady in my Bible study who has missed quite a few weeks because of back problems; this is the most recent card I decided to send to her. Products Used: Lacy & Lovely stamp set (7), W 122885, $24.95; C122887, $17.95 Fruit & Flowers stamp set (9), W 122605, $20.95; C 122607, $15.95 Whisper White 8½" x 11" card stock (40), 100730, $8.50 Berry Blossoms Designer Series Paper, 2011-12 Idea Book & Catalog Wisteria Wonder 3/8" Ruffled Ribbon (10 yds.), 122973, $9.95 Early Espresso Classic Stampin' Pad, 126974, $5.95 Calypso Coral Classic Stampin' Pad, 126983, $5.95 Pearl Basic Jewels (150 in 3 sizes), 119247, $4.95

Last Minute Ornament Card

Image
The UPS truck arrived about 2 hours before my stamp class last night. I had been waiting anxiously for it and quickly grabbed the Holiday Frame Textured Impressions Embossing Folder from the box so I could replicate the card I'd seen on Gloria's blog (designzbygloria.com). So easy. So dramatic. I believe it's the color of our Midnight Muse ink and card stock that make is such an impressive card. I hope you like it as much as I do. (Sorry the top edge was cut off a little when I scanned it, but I think you get the idea). Anyway, my attendees loved it, too, especially when they discovered how quick and easy it is. Products Used: Ornament Keepsakes stamp set (9), W 128048, $34.95; C 128051, $25.95 Midnight Muse 8½" x 11" card stock (24), 126860, $6.95 Whisper White 8½" x 11" card stock (40), 100730, $8.50 Midnight Muse Classic Stampin' Pad, 126860, $5.95 Midnight Muse 3/8" Stitched Satin Ribbon (10 yds.), 126847, $8.95 Holiday Ornaments

Pop-up With Gift Card

Image
This is the first pop-up card I've made and it's perfect for that gift card you wish to give someone for Christmas or, with adaptation, birthday. Because I haven't purchased a gift card yet, I merely inserted a Kohl's coupon card to give the idea. The design calls for permanently inserting the gift card envelope in the platform after punching the top of it with an oval punch so the edge of the gift shows and is easily removable. I used some discontinued ribbon from last year's holiday catalog. It's funny because I never used it last year but I love the looks of it on this year's card. I'm sure you could use white taffeta or Whisper White stitched grosgrain ribbon in its place, however. There is a "belly band" beneath the layer of designer series paper that fastens behind the card so it doesn't pop open until you're ready for it to do so. Products Used: Scentsational Season stamp set (6), W 121026, $18.95; C 121190, $14.95  

Sweet Christmas Favor

Image
Another class with a Christmas theme! Thursday's class is more about 3-D items than it is about cards. One of our projects is this cute little Christmas favor. I took Kathy Kalthoff's fall jar and made it into a Christmas project. I just love it! Couldn't believe such a small box could actually hold four Hershey nuggets! The box is made using two jars stamped with the Perfectly Preserved stamp set and cut with the coordinating Cannery Set of Framelit Dies. The oval punched in the middle enables the recipient to see what's inside. Of course, to make the jar cut-outs into a box, I needed to put something between them. So I cut a 1½" x 4½" piece of coordinating card stock and scored it ¼ inch inside both long edges and then as well as 1½" down from each end. I also chose a piece of designer series paper in the same pattern as the "cloth" jar topper to cover the wrapped chocolates (1¼" x 1½" scored ¼" inside the longer edges). The

Triple Layer Christmas Card

Image
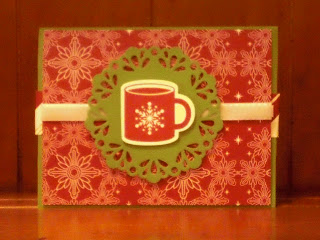
I've not been very faithful at blogging lately. This has been an incredibly busy season in my life, between my brother's hospital stays and our son's transition from unemployed to a job in Tennessee. So many complications in figuring out how to move the little bit of stuff he has here in New York state and the stuff still in Ohio. We discovered the costs of moving it was about equal to purchasing new furniture. Now he's just making car trips to get the rest of his belongings. At least he has the necessities there. But he was constantly needing advice. Of course, if he had a wife, she would be the one helping him make all his decisions... :-) Anyway, this is the card of the month for my class at the Red Jacket Community Library in Shortsville. Last month the ladies had admired one of my triple layer cards, so I promised I would show them that technique this month, but in a Christmas card. Just two colors: Real Red and Old Olive with some Whisper White card stock. Simpl
Image
Stampin' Up! has a redesigned trimmer that has so many extras to make crafting so much easier. Be sure to check it out. Is now available for sale. Just link onto my demonstrator business web site to order - or contact me directly!